
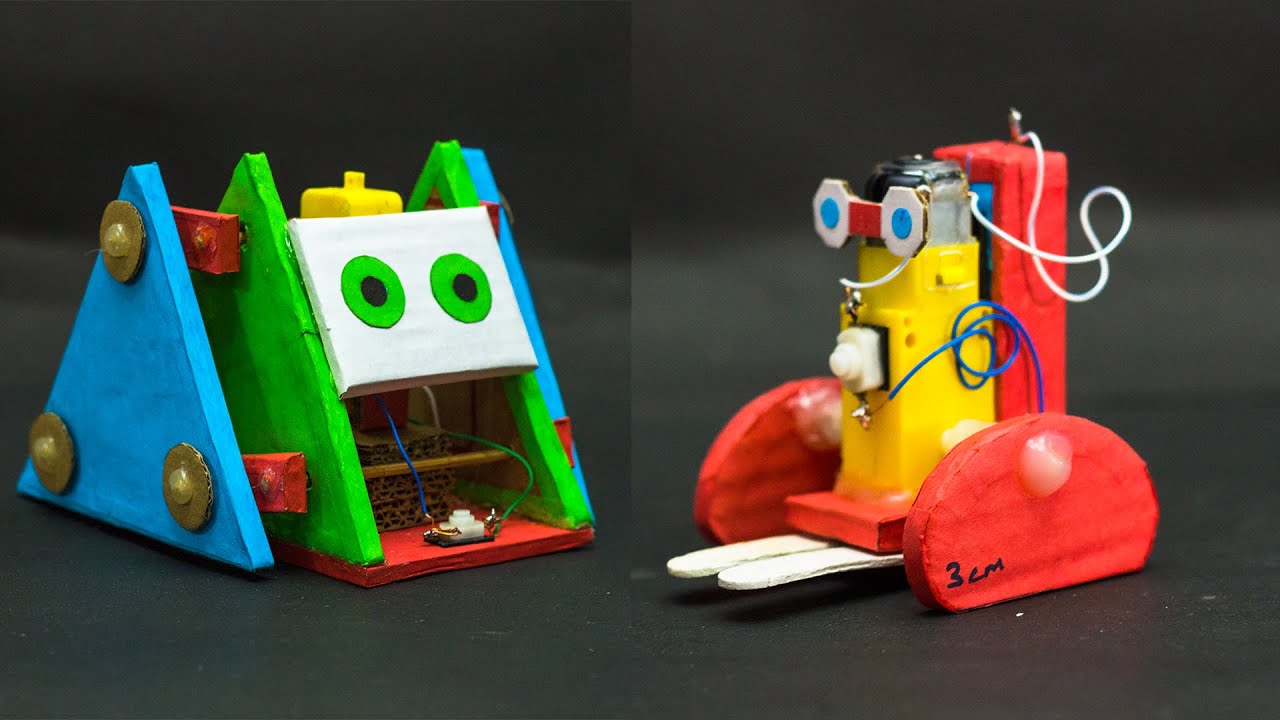
Educational robotics gives students an opportunity to turn ideas into working solutions. By designing, building, and programming robots, learners explore how technology works while developing essential skills such as logical reasoning, creativity, teamwork, and problem-solving. Instead of only reading about engineering or computer science, students can test their ideas in practical situations and observe the results.
Well-designed educational robotics projects for students encourage learners to identify problems, break complicated tasks into manageable steps, develop possible solutions, and improve their designs through testing. When a robot fails to follow a route, pick up an object, or respond to a sensor, students must investigate what went wrong and decide how to fix it. This process makes problem-solving a practical, repeatable learning experience.
Robotics projects can be adapted for elementary, middle, and high school classrooms. Younger learners can create simple obstacle courses using programmable robots, while older students can develop sensor-based systems, automated vehicles, and assistive technology prototypes. The equipment may differ, but the central learning process remains the same: understand the challenge, plan a solution, test it, analyze the evidence, and make improvements.
What Is Educational Robotics?
Educational robotics is an approach to teaching in which students use robots, programmable devices, mechanical components, and software to explore academic concepts and solve practical problems.
A robotics project may involve assembling a simple machine, programming a robot to follow a path, using sensors to detect obstacles, or designing an automated system for a classroom or community challenge.
Educational robotics often combines several subject areas:
- Science: Exploring forces, motion, energy, light, sound, and sensors.
- Technology: Understanding digital systems, hardware, software, and automation.
- Engineering: Designing, constructing, testing, and improving solutions.
- Mathematics: Measuring distances, calculating angles, identifying patterns, and comparing results.
- Computer science: Developing algorithms, using conditional statements, repeating instructions, and debugging code.
This combination makes robotics suitable for interdisciplinary learning. Students can apply mathematical and scientific concepts to a project rather than treating each subject as an isolated topic.
Robotics can involve physical robots, virtual simulations, programmable microcontrollers, or simple construction materials. A school does not need an expensive robotics laboratory to introduce meaningful problem-solving activities.
Why Are Robotics Projects Important for Problem-Solving Skills?
Problem-solving involves recognizing a challenge, understanding its requirements, considering possible solutions, selecting an approach, and evaluating the outcome. Robotics provides a concrete environment in which students can practice these steps.
1. Students Learn to Break Complex Problems Into Smaller Tasks
A robot that must navigate a maze faces several smaller challenges. It needs to move in the correct direction, recognize obstacles, make turns, and reach its destination.
Students can divide the task into manageable steps, program each part, and combine the instructions into a complete solution. This process is called decomposition.
For example, a delivery robot project can be divided into four tasks:
- Start at a marked location.
- Follow a route through the classroom.
- Avoid or respond to obstacles.
- Stop at the correct destination.
By solving each part separately, students can understand a complicated task more clearly and identify errors more quickly.
2. Robotics Encourages Logical Thinking
Robots generally follow the instructions provided by their programs. If the instructions are incomplete or arranged incorrectly, the robot may not behave as expected.
Students must think carefully about the order of commands, the conditions that trigger actions, and the consequences of each instruction.
For example, a student programming a robot to turn after moving a certain distance must consider how far the robot travels, when the turn occurs, and whether the turning angle is appropriate.
These experiences help learners understand cause and effect, sequences, conditions, and logical relationships.
3. Students Develop Persistence Through Debugging
A robot that does not work correctly gives students a reason to investigate. They may need to inspect the code, check a connection, adjust a sensor, or reconsider their original design.
Instead of treating a failed attempt as the end of the activity, teachers can encourage students to view it as information that helps them improve.
Effective debugging involves identifying the problem, forming a hypothesis, changing one relevant element, and testing the result. This is more productive than changing several things randomly.
4. Robotics Supports Creative Thinking
Many robotics challenges have several possible solutions. A robot can navigate an obstacle course using different routes, and a mechanical arm can pick up an object using different designs.
Students can compare alternative approaches and explain why they selected one design over another.
Creativity becomes especially valuable when projects include realistic constraints, such as limited materials, restricted movement, battery capacity, time, or cost.
5. Students Learn to Make Decisions Using Evidence
A robot may complete a task sometimes but fail under different conditions. Students need evidence to decide whether a change has actually improved the design.
For example, they can record how many times a robot successfully completes a route before and after adjusting its speed or turning angle.
This approach encourages students to compare results instead of relying only on guesses or personal preferences.
6. Robotics Builds Collaboration and Communication
Group robotics projects require students to share ideas, coordinate tasks, explain their reasoning, and negotiate decisions.
One student may develop the program, another may assemble the robot, and a third may record test results. Students should also rotate roles so everyone experiences different parts of the process.
When team members explain their decisions to one another, they learn to communicate technical ideas clearly and consider alternative perspectives.
10 Educational Robotics Projects for Students
The following projects develop problem-solving skills through practical challenges. Teachers can adapt them to different ages, available materials, and curriculum requirements.
1. Build a Robot That Navigates an Obstacle Course
<text color=”secondary” size=”sm”>Recommended level: Elementary to middle school</text>
<AsyncImage query=”educational programmable robot navigating simple classroom obstacle course colorful blocks STEM students” aspectRatio=”16:9″ width=”100%” />
Problem-solving skills: Planning, sequencing, spatial reasoning, testing, and debugging.
An obstacle-course robot must move from a starting point to a destination without colliding with objects. Students need to determine the route, estimate distances, select turning angles, and adjust their instructions when the robot moves incorrectly.
Materials:
- A programmable educational robot or simple wheeled robot
- Floor markers or tape
- Lightweight obstacles, such as cardboard blocks
- A measuring tape or ruler
- A notebook for recording results
Steps:
- Create a course with a clear starting point, destination, and several obstacles.
- Ask students to draw a route before programming the robot.
- Divide the route into individual movements and turns.
- Program the robot to follow the planned sequence.
- Run the robot and record where it succeeds or fails.
- Adjust the program and test the revised route.
How it develops problem-solving: Students must translate a visual route into precise instructions. When the robot collides with an obstacle or misses a turn, they analyze the sequence and identify the source of the error.
Extension: Introduce a new obstacle after the original program works. Students must modify their solution without starting the entire project again.
2. Create a Line-Following Robot
<text color=”secondary” size=”sm”>Recommended level: Middle school</text>
<AsyncImage query=”educational line following robot with infrared sensors following black tape track on white board classroom STEM robotics” aspectRatio=”16:9″ width=”100%” />
Problem-solving skills: Pattern recognition, conditional logic, measurement, and experimentation.
A line-following robot uses sensors to detect a marked path and adjust its movement to remain on course. Students learn how a system can use information from its environment to make decisions.
Materials:
- A programmable wheeled robot
- Compatible line sensors
- White paper or a light-colored board
- Black tape
- Programming software
Steps:
- Create a simple track using black tape.
- Introduce students to the robot’s sensors and explain what they detect.
- Program the robot to move forward when the line is detected in the expected position.
- Add instructions that correct the robot’s direction when it drifts away from the line.
- Test the robot on straight sections and curves.
- Adjust sensor thresholds, speed, or turning behavior as needed.
How it develops problem-solving: Students learn to connect sensor input with programmed decisions. They also discover that a program that works on a straight line may need improvement when the track becomes more complicated.
Extension: Challenge students to design a track that includes sharp curves and intersections. Ask them to compare completion times and success rates.
3. Design a Robot That Detects and Avoids Obstacles
<text color=”secondary” size=”sm”>Recommended level: Middle to high school</text>
<AsyncImage query=”educational robotics car with ultrasonic distance sensor avoiding cardboard obstacle on classroom table” aspectRatio=”16:9″ width=”100%” />
Problem-solving skills: Conditional reasoning, sensor interpretation, decision-making, and iterative testing.
This project introduces students to robots that react to changes in their surroundings. The robot uses a distance sensor or another suitable sensor to detect objects and select an action.
Materials:
- A programmable robot
- A compatible distance sensor
- Lightweight obstacles
- A measuring tape
- Programming software
Steps:
- Assemble the robot and connect its sensor according to the manufacturer’s instructions.
- Write a program that reads the distance to an object.
- Set a starting rule, such as slowing down when an object is detected within a chosen distance.
- Add an action, such as stopping or turning, when the object is too close.
- Test the robot with obstacles placed at different distances.
- Record its behavior and revise the threshold or movement instructions.
How it develops problem-solving: Students must decide what information the robot needs and how it should respond. They also learn that sensors have limitations and that readings may vary with object shape, surface, or position.
Extension: Ask students to compare two avoidance strategies. One robot might always turn in the same direction, while another chooses a direction based on additional sensor readings.
4. Build a Robotic Arm for Picking Up Objects
<text color=”secondary” size=”sm”>Recommended level: Middle to high school</text>
<AsyncImage query=”student educational robotics project simple robotic arm with servo motors cardboard gripper picking up small block STEM engineering” aspectRatio=”16:9″ width=”100%” />
Problem-solving skills: Mechanical design, spatial reasoning, precision, and optimization.
A robotic arm challenges students to move an object from one location to another. They must consider how the arm moves, how the gripper holds an object, and how much force is required.
Materials:
- A classroom robotic arm kit or teacher-approved construction materials
- Motors or servos, if available
- Lightweight objects of different shapes
- A marked pickup and delivery area
- A notebook
Steps:
- Define the task, including the size and weight of the objects.
- Sketch a proposed arm and gripper design.
- Assemble the mechanism or use a ready-made educational arm.
- Program or operate the arm to pick up an object.
- Test different objects and record successful pickups.
- Improve the gripper shape, movement sequence, or positioning.
How it develops problem-solving: Students discover that a design suitable for one object may not work for another. They must analyze the relationship between object shape, gripping force, movement, and stability.
Extension: Give teams a limited materials budget and ask them to design a gripper that can handle several types of lightweight objects.
5. Program a Robot to Deliver Classroom Supplies
<text color=”secondary” size=”sm”>Recommended level: Elementary to middle school</text>
Problem-solving skills: Route planning, sequencing, collaboration, and practical design.
In this project, students program a robot to deliver a lightweight item from a starting point to one or more destinations. The task connects robotics with everyday logistical challenges.
Materials:
- A wheeled programmable robot
- Floor markers
- Lightweight objects, such as empty boxes or paper packages
- A classroom map
- A recording sheet
Steps:
- Draw a map of the delivery area.
- Mark the starting point, destination, and any restricted zones.
- Plan a route and estimate the required movements.
- Program the robot to travel along the route.
- Add a simple carrying attachment if the equipment allows it.
- Test the delivery and record whether the robot reaches the correct location.
- Revise the route to improve reliability or reduce unnecessary movements.
How it develops problem-solving: Students must coordinate several actions and consider constraints such as distance, obstacles, turning space, and carrying capacity.
Extension: Add two delivery points and ask students to compare different route sequences. They can discuss which route is shortest and which is easiest for the robot to complete reliably.
6. Build a Robot That Responds to Light
<text color=”secondary” size=”sm”>Recommended level: Middle school</text>
Problem-solving skills: Experimental design, observation, data analysis, and conditional programming.
A light-responsive robot uses a light sensor to change its behavior based on the brightness of its surroundings.
Materials:
- A programmable robot
- A compatible light sensor
- A flashlight or suitable classroom light source
- Cardboard screens
- A notebook
Steps:
- Introduce the light sensor and observe its readings under different lighting conditions.
- Record readings in a bright area and a shaded area.
- Choose a threshold that distinguishes between the tested conditions.
- Program the robot to perform different actions depending on the sensor reading.
- Test the program under several lighting conditions.
- Adjust the threshold if the robot responds inconsistently.
How it develops problem-solving: Students learn to collect information before selecting a rule. They must determine whether a problem comes from the sensor, the environment, or the program.
Extension: Design a simple light-seeking or light-avoiding behavior. Ask students to explain how their sensor readings influence the robot’s movements.
7. Create a Robot That Sorts Objects
<text color=”secondary” size=”sm”>Recommended level: Middle to high school</text>
Problem-solving skills: Classification, logical rules, automation, and systems thinking.
Sorting is a useful introduction to automated decision-making. Students can design a system that separates objects according to one visible characteristic, such as color, size, or shape.
Materials:
- An educational robot, robotic arm, or tabletop sorting mechanism
- Safe, lightweight objects
- A sensor suitable for the chosen classification task
- Separate collection containers
- A data table
Steps:
- Select a simple sorting rule, such as separating two colors.
- Prepare a set of objects and define the correct category for each one.
- Determine how the robot or sensor will identify the categories.
- Program the mechanism to move each object to the appropriate container.
- Test it with familiar objects and then with objects that differ slightly.
- Record correct and incorrect classifications.
- Modify the program or physical design to reduce errors.
How it develops problem-solving: Students must define a clear rule, translate it into instructions, and evaluate whether the system follows that rule consistently.
Extension: Introduce a third category or objects that are difficult to classify. Students can discuss how ambiguous inputs should be handled.
8. Program a Robot to Play a Simple Game
<text color=”secondary” size=”sm”>Recommended level: Elementary to middle school</text>
Problem-solving skills: Algorithm design, strategy, prediction, and iterative improvement.
A robot can be programmed to complete a simple game, such as reaching a target zone, collecting tokens, or navigating a grid. The activity encourages students to think strategically and improve their instructions.
Materials:
- A programmable robot
- A grid marked on paper or the floor
- Lightweight tokens
- A set of game rules
- A scoring sheet
Steps:
- Define the objective and the rules.
- Create a grid with a start point, target, and optional obstacles.
- Ask students to write a sequence of instructions before programming.
- Run the robot and calculate the score.
- Review where the strategy succeeded or failed.
- Revise the instructions and compare the results.
How it develops problem-solving: Students must plan ahead, predict outcomes, and recognize that a small change in instructions can affect the entire sequence.
Extension: Let teams design their own grid game and exchange challenges. Each team must explain the rules clearly enough for another group to program a solution.
9. Design a Robot for a Community Challenge
<text color=”secondary” size=”sm”>Recommended level: Middle to high school</text>
Problem-solving skills: Research, creative design, teamwork, and evaluation of real-world constraints.
This open-ended project asks students to design a robot that could help with a practical challenge. The goal is to apply engineering and programming ideas to a meaningful situation.
Possible project themes include:
- Moving lightweight supplies around a school.
- Helping sort reusable materials.
- Monitoring classroom light levels.
- Demonstrating how a robot could inspect a model of a difficult-to-access area.
- Delivering small objects in a simulated healthcare or library environment.
Steps:
- Identify a specific problem and the people affected by it.
- Research how the problem is currently addressed.
- Define the robot’s intended function and limitations.
- Draw a design and list the materials required.
- Build a prototype or create a simulation.
- Test the prototype against the stated requirements.
- Present the results and identify improvements.
How it develops problem-solving: Students must balance several factors, including usability, safety, cost, reliability, and technical feasibility. They learn that a good solution must address the actual problem rather than simply demonstrate an interesting technology.
Extension: Ask students to compare their prototype with an alternative non-robotic solution. This encourages realistic evaluation instead of assuming that automation is always the best choice.
10. Develop a Robot That Completes a Multi-Step Mission
<text color=”secondary” size=”sm”>Recommended level: Middle to high school</text>
Problem-solving skills: Decomposition, algorithms, conditional logic, testing, and project management.
A multi-step mission combines several skills in one challenge. For example, a robot might follow a path, stop at a marker, detect an object, move around an obstacle, and return to its starting point.
Materials:
- A programmable robot with suitable sensors
- Floor markers and lightweight obstacles
- A mission map
- A testing checklist
- A team planning sheet
Steps:
- Define the mission and list the required actions.
- Divide the mission into smaller tasks.
- Write an algorithm or flowchart describing the sequence.
- Program and test each task separately.
- Combine the tasks into a complete program.
- Run the full mission and record failures.
- Debug the program and repeat the test.
How it develops problem-solving: Students learn that a complicated system may fail because of one small error. They must isolate the problem, understand how the different components interact, and test the complete solution after making changes.
Extension: Introduce a new requirement after the robot completes the original mission. Students must update their design while preserving the functions that already work.
A Step-by-Step Problem-Solving Framework for Robotics Projects
Robotics projects become more educational when teachers explicitly guide students through a repeatable problem-solving process. Without this structure, learners may spend most of their time assembling parts or repeatedly changing code without understanding why a solution works.
The following framework can be used for almost any educational robotics activity.
Step 1: Define the Problem Clearly
Begin by explaining what the robot must accomplish. Students should understand the goal, the environment, and any restrictions.
For example, “Build a robot” is too broad to guide a meaningful investigation. A clearer challenge is, “Program a robot to reach three marked locations without touching the obstacles.”
Ask students to identify the conditions that will determine whether their solution is successful.
Step 2: Identify Constraints and Requirements
Real problems involve limitations. Students may have a fixed number of components, a limited amount of time, a small operating area, or a maximum robot size.
Have them list essential requirements and distinguish these from optional improvements.
This encourages practical planning and helps students avoid spending time on features that do not support the main objective.
Step 3: Brainstorm Possible Solutions
Invite students to draw, discuss, or describe several possible approaches before building.
A group designing a maze-solving robot might consider a simple programmed route, a sensor-based approach, or a combination of the two.
Encourage students to explain the strengths and limitations of each idea. The first solution is not always the most reliable or efficient.
Step 4: Create an Algorithm or Design Plan
Students should convert their chosen approach into a clear sequence of actions.
Depending on their age and experience, this plan might be:
- A numbered list of instructions.
- A flowchart showing decisions.
- Pseudocode describing the program.
- A sketch of the mechanical design.
- A table connecting sensor readings with robot actions.
Planning before programming helps students identify missing steps and potential errors.
Step 5: Build and Program the Prototype
Students assemble the robot, connect the required components, and write the program. Teachers should introduce new components gradually and provide enough guidance for learners to focus on the intended problem-solving objective.
The first version should be treated as a prototype rather than a finished product.
Step 6: Test the Solution Systematically
Students should test their robot under consistent conditions and record what happens.
A simple testing table might include the following information:
| Test | Change made | Observed result | Next step |
|---|---|---|---|
| 1 | Initial program | Robot turns too late | Review movement timing |
| 2 | Reduced forward movement | Robot turns closer to the marker | Test again |
| 3 | Adjusted turning angle | Robot completes the turn more consistently | Repeat multiple trials |
The entries above are illustrative. Students should record their actual results rather than copying an expected outcome.
Step 7: Debug and Improve
When the robot fails, students should identify the most likely cause before changing anything.
Useful questions include:
- Did the robot receive the correct sensor input?
- Were the instructions arranged in the correct order?
- Was a component connected properly?
- Did the environment affect the result?
- Did the latest change improve performance?
Changing one relevant factor at a time makes it easier to understand cause and effect.
Step 8: Evaluate and Communicate the Results
Students should compare their final design with the original requirements. They can report how reliably the robot performed, what problems remained, and what they would change with more time.
A short presentation, design journal, or demonstration allows learners to explain their reasoning and learn from other teams.
How Robotics Supports Computational Thinking
Computational thinking is an approach to solving problems that uses concepts such as decomposition, pattern recognition, abstraction, and algorithm design. Robotics provides a practical context for developing these skills.
Decomposition
Students divide a complex challenge into smaller tasks. A delivery robot, for example, may require separate movement, turning, obstacle detection, and stopping routines.
Pattern Recognition
Students identify repeated actions or recurring conditions. If a robot repeatedly overshoots a corner, learners can look for patterns in the distance traveled, speed, or turning behavior.
Abstraction
Students focus on the details that matter to the problem. A maze-solving program may represent a route using directions and distances without needing to model every feature of the surrounding classroom.
Algorithm Design
Students create an ordered set of instructions that leads to a goal. They must consider the correct sequence, conditions, and repeated actions.
Debugging
Students locate and correct errors in code or design. Debugging teaches them to test explanations against evidence rather than making random changes.
Teachers should not assume that merely using a robot automatically develops computational thinking. Students need explicit opportunities to explain their algorithms, identify patterns, and reflect on the strategies they use.
Adapting Robotics Projects for Different Grade Levels
The most effective educational robotics projects match the complexity of the challenge to students’ developmental levels and prior experience.
Robotics Projects for Elementary Students
Young learners benefit from short tasks, visual instructions, physical movement, and immediate feedback.
Suitable projects include:
- Programming a robot to move forward and turn.
- Navigating a simple obstacle course.
- Creating a grid-based delivery mission.
- Using cards to plan a sequence of movements.
- Exploring cause and effect through simple sensor activities.
Teachers can begin with screen-free or icon-based programming before introducing more advanced coding concepts.
Teaching tip: Ask students to predict what the robot will do before pressing the start button. Comparing their predictions with the actual result helps develop logical reasoning.
Robotics Projects for Middle School Students
Middle school learners can work with more complex sequences, sensors, conditional statements, and repeated testing.
Suitable projects include:
- Building a line-following robot.
- Creating an obstacle-avoidance system.
- Designing a sorting mechanism.
- Measuring how speed affects a robot’s ability to complete a route.
- Developing a robot that completes a multi-step mission.
Students should begin documenting their design choices and using measurements to evaluate improvements.
Teaching tip: Require a brief explanation of each major program change. This helps students understand why a modification was made instead of relying on trial and error alone.
Robotics Projects for High School Students
High school learners can investigate more advanced engineering challenges and evaluate solutions against several requirements.
Suitable projects include:
- Sensor-based navigation.
- Robotic arms and automated handling.
- Environmental monitoring prototypes.
- Multi-step autonomous missions.
- Simulations of robots used in healthcare, agriculture, logistics, or exploration.
Students can also compare physical robots with simulations, analyze system limitations, and consider accessibility, reliability, energy use, and ethical implications.
Teaching tip: Introduce performance criteria such as completion rate, accuracy, time, and material cost. Students should justify their final design using evidence from their tests.
How Teachers Can Assess Problem-Solving Skills in Robotics
Assessing a robotics project should involve more than checking whether the robot works at the end. A student may produce a successful result through repeated guessing, while another may demonstrate excellent reasoning but encounter an unresolved technical problem.
A balanced assessment examines both the process and the outcome.
1. Evaluate Problem Definition
Can students explain the challenge in their own words? Do they understand the requirements and constraints?
2. Assess Planning
Look at whether students developed a design, algorithm, flowchart, or testing strategy before building.
3. Observe Debugging
Ask students to describe a problem they encountered, what they thought caused it, and how they tested their explanation.
4. Review the Use of Evidence
Students should be able to compare results across trials and explain whether a modification improved the robot’s performance.
5. Assess Collaboration
Observe whether team members share responsibilities, listen to different ideas, and explain their decisions respectfully.
6. Evaluate Reflection
Ask students what they learned, what remains difficult, and what they would change in a future version.
Example Robotics Assessment Rubric
The following rubric can be adapted to the age group and learning objectives.
| Assessment area | Developing | Proficient | Advanced |
|---|---|---|---|
| Problem definition | Needs help identifying the main goal | Clearly identifies the goal and constraints | Defines the goal, constraints, and relevant trade-offs |
| Planning | Begins building with limited planning | Creates a workable design or algorithm | Compares alternatives and justifies the selected approach |
| Testing and debugging | Makes changes without a clear method | Tests the robot and corrects identified errors | Uses systematic tests and evidence to improve performance |
| Collaboration | Participates inconsistently | Shares tasks and communicates effectively | Supports teammates and integrates different ideas |
| Reflection | Gives a limited description of the result | Explains what worked and what did not | Uses evidence to evaluate the solution and propose improvements |
Teachers can use these criteria for individual feedback, group assessment, or student self-reflection.
Common Challenges in Robotics Education and How to Address Them
Challenge 1: Students Focus Only on Making the Robot Move
Students may become excited about the equipment and overlook the underlying learning objective.
Solution: Begin with a clearly defined problem and require students to explain the decisions behind their design. A successful demonstration should be accompanied by evidence of planning and reasoning.
Challenge 2: Students Rely on Random Trial and Error
Repeatedly changing code without identifying a likely cause can waste time and make learning less effective.
Solution: Teach a structured debugging routine: observe, identify the likely cause, change one relevant factor, test, and record the result.
Challenge 3: Technical Problems Interrupt Learning
Loose connections, depleted batteries, incompatible components, or software difficulties may prevent students from investigating the intended concept.
Solution: Check equipment before lessons, provide simple troubleshooting guides, and use simulations or preassembled robots when appropriate.
Challenge 4: Some Students Dominate Group Projects
Learners with prior coding or building experience may take control, leaving others with limited opportunities to contribute.
Solution: Assign rotating roles such as programmer, builder, tester, recorder, and presenter. Ensure that every student participates in decision-making and reflection.
Challenge 5: Schools Have Limited Budgets
Robotics kits and electronic components can be expensive, especially when every student needs individual equipment.
Solution: Use shared kits, reusable construction materials, screen-free activities, low-cost programmable devices, or virtual robotics environments. Focus on the quality of the problem-solving task rather than the price of the equipment.
Challenge 6: Students Struggle to Transfer Skills to Other Subjects
Learners may solve a robotics challenge without recognizing how the same reasoning can apply to mathematics, science, or everyday problems.
Solution: Ask students to identify the strategies they used and explain where else those strategies could be useful. Connect robot measurements with mathematics, sensors with science, and algorithms with computer science.
A Sample Five-Day Robotics Lesson Plan
Teachers can use this sequence to introduce students to robotics-based problem-solving. The example is suitable for middle school and can be simplified or extended as needed.
| Day | Learning objective | Main activity | Student output |
|---|---|---|---|
| Day 1 | Understand the challenge | Explore the robot and plan an obstacle course | Problem statement and route sketch |
| Day 2 | Develop an algorithm | Write and test movement instructions | Initial program or flowchart |
| Day 3 | Identify and correct errors | Run tests and record failures | Testing table and debugging notes |
| Day 4 | Improve the design | Revise the program and repeat trials | Improved prototype and results |
| Day 5 | Explain the solution | Demonstrate the robot and reflect on the process | Presentation and individual reflection |
At the end of the project, students should be able to explain the original problem, describe the strategy they selected, provide evidence of testing, and identify at least one improvement they made.
Teachers can extend the unit by adding sensors, increasing the number of obstacles, or asking students to design their own challenge for another team.
Best Practices for Successful Robotics Projects
Teachers can make robotics activities more effective by focusing on learning objectives rather than technology alone.
Start with a meaningful challenge. Give students a clear goal that requires planning and reasoning. The challenge should be difficult enough to encourage thinking but achievable with appropriate support.
Provide structured guidance. Demonstrate unfamiliar components and explain essential programming concepts. Then allow students to make decisions and develop their own solutions.
Encourage collaboration. Organize teams with rotating responsibilities so that students develop technical, communication, and planning skills.
Make testing part of the lesson. Students should have enough time to test their robot more than once, compare outcomes, and improve their design.
Reward reasoning as well as results. Recognize thoughtful planning, careful experimentation, useful debugging, and clear explanations—not just a robot that finishes first.
Connect robotics to real-world applications. Discuss how similar principles are used in warehouses, agriculture, manufacturing, environmental monitoring, assistive technology, and scientific exploration.
Use reflection to reinforce learning. Ask students to identify which problem-solving strategy was most useful and how they might apply it to a different challenge.
Frequently Asked Questions
How do educational robotics projects develop problem-solving skills?
Educational robotics projects ask students to define a goal, plan a solution, program or construct a robot, test its behavior, and correct errors. This process develops logical reasoning, decomposition, experimentation, decision-making, and persistence. The benefits depend on how the activity is taught and whether students reflect on their strategies.
What are the best educational robotics projects for beginners?
Beginners can start with simple obstacle courses, grid-based navigation, basic movement sequences, and light-responsive activities. These projects introduce core concepts without requiring advanced programming or complex equipment.
Do students need coding experience to participate in robotics projects?
No. Many robotics activities use physical movement cards, icon-based programming, block-based coding, or preassembled robots. Students can begin with basic sequences and gradually progress to loops, conditions, sensors, and more advanced programming.
Can robotics projects be completed without expensive equipment?
Yes. Teachers can use shared robotics kits, low-cost programmable devices, recycled construction materials, screen-free planning activities, or virtual robotics simulations. The main objective is to provide a meaningful problem that students can investigate and improve.
How does robotics support STEM education?
Robotics integrates science, technology, engineering, and mathematics through practical design challenges. Students apply concepts such as motion, measurement, geometry, programming, and mechanical systems while creating and testing solutions.
How can teachers prevent students from relying on trial and error?
Teach students to identify a likely cause before changing their design. Ask them to modify one relevant factor at a time, record the results, and explain why the change did or did not work. This makes debugging more systematic and educational.
What is the difference between robotics and computational thinking?
Robotics involves designing, building, or programming robotic systems. Computational thinking involves strategies such as decomposition, pattern recognition, abstraction, and algorithm design. Robotics can provide a practical setting for computational thinking, but using a robot does not automatically develop every computational thinking skill.
How can teachers measure problem-solving progress in robotics?
Teachers can assess students’ planning, design decisions, debugging strategies, use of test results, collaboration, and reflection. Design journals, observation checklists, project rubrics, and individual explanations help reveal the reasoning behind the final result.
What subjects can be taught through educational robotics?
Robotics can support computer science, mathematics, physics, engineering, environmental science, and technology education. Depending on the project, students can also practice writing, research, collaboration, and presentation skills.
Conclusion
Educational robotics provides students with a practical way to develop problem-solving skills through design, programming, testing, and improvement. Projects such as obstacle-course navigation, line following, robotic arms, object sorting, and multi-step missions encourage learners to break complex tasks into smaller parts, apply logical reasoning, and evaluate possible solutions.
The greatest educational value comes from the process behind the finished robot. Students should have opportunities to plan their approach, test their ideas, learn from errors, use evidence to guide changes, and explain why their final design works.
By selecting age-appropriate challenges and providing structured guidance, teachers can make educational robotics projects for students accessible even when classroom resources are limited. These activities can support STEM learning while helping students develop persistence, creativity, communication, and practical problem-solving strategies that are useful well beyond the robotics classroom.
