
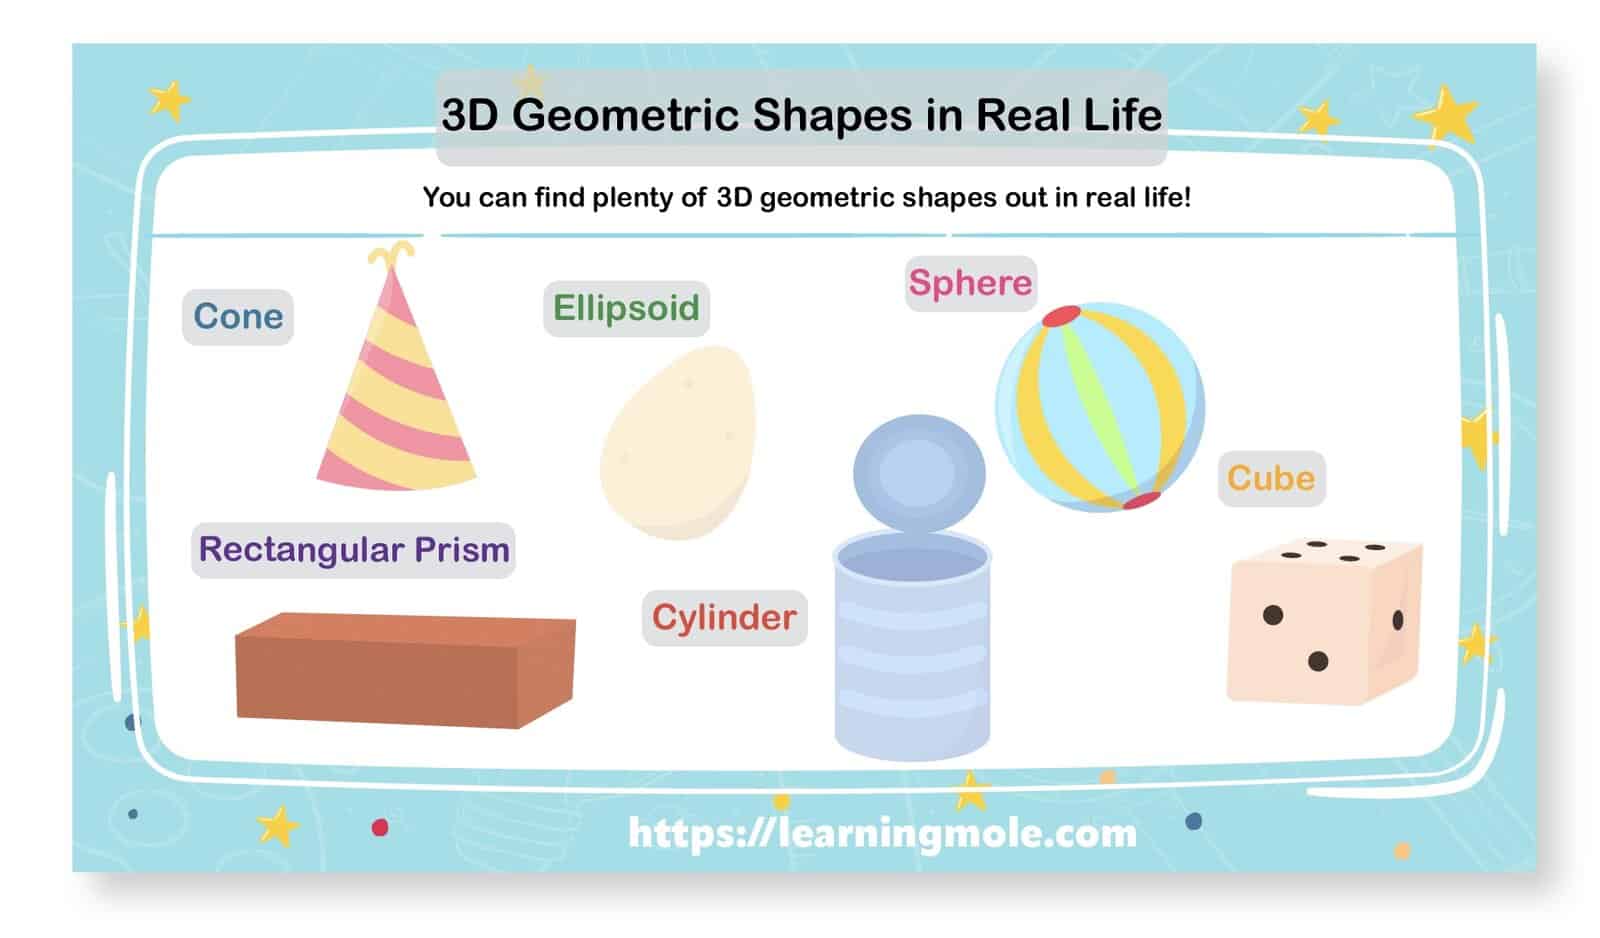
Geometry becomes easier to understand when students can connect mathematical concepts to objects, places, and experiences they encounter every day. From the shapes of buildings and the patterns on floor tiles to the angles of playground equipment and the dimensions of a garden, geometry helps explain how the world is designed and organized.
However, students may struggle when geometry lessons focus only on definitions, diagrams, and formulas. They might know how to calculate the area of a rectangle on paper but find it difficult to determine how much flooring a classroom needs. Real-world examples help bridge this gap by allowing learners to observe, measure, build, compare, and solve practical problems.
Using real world geometry activities for students can make mathematics more engaging while helping learners develop spatial awareness, logical reasoning, measurement skills, and problem-solving abilities. These activities also encourage students to explain their thinking and understand why geometric concepts matter beyond the classroom.
This guide explores practical ways to teach geometry through everyday examples, including hands-on activities, real-life applications, sample problems, and strategies teachers can adapt for different grade levels.
Why Teach Geometry Through Real-World Examples?
Geometry is closely connected to the physical environment. Students encounter geometric shapes, lines, angles, distances, and patterns whenever they walk through a building, play a sport, create artwork, or arrange objects.
Connecting classroom learning with these experiences helps students understand how abstract mathematical ideas work in practical situations.
1. Make Abstract Concepts Easier to Understand
Terms such as perimeter, area, symmetry, parallel lines, and volume can feel abstract when students encounter them only in textbooks.
Real objects provide concrete examples. A classroom door demonstrates a rectangle, a clock face illustrates a circle, and floor tiles can help students understand area and repeated patterns.
When students observe and measure these objects, they can connect mathematical vocabulary with something they already recognize.
2. Improve Problem-Solving Skills
Real-world geometry activities encourage students to identify a problem, determine which measurements are needed, select an appropriate formula, and interpret the result.
For example, calculating how much fencing is needed for a school garden requires students to understand perimeter. Estimating the amount of paint required for a wall introduces area and measurement.
These tasks encourage learners to think beyond memorizing formulas and focus on using mathematics to make decisions.
3. Develop Spatial Reasoning
Spatial reasoning involves understanding the positions, shapes, sizes, and relationships of objects in space.
Activities such as constructing models, interpreting maps, folding paper, and designing patterns help students visualize how shapes fit together and change when rotated, reflected, or rearranged.
These skills are useful in geometry and can also support learning in subjects such as science, technology, engineering, art, and geography.
4. Encourage Collaboration and Creativity
Many practical geometry tasks work well as group projects. Students can collaborate to design a playground, construct a bridge model, measure a garden, or create a symmetrical artwork.
Each learner can contribute observations, calculations, drawings, and explanations. Discussing different approaches also helps students understand that a problem may have more than one reasonable solution.
12 Real-World Geometry Activities for Students
The following activities use familiar objects and practical challenges to help students explore geometry. Teachers can adjust the difficulty according to students’ ages, mathematical knowledge, and available materials.
1. Organize a Geometry Scavenger Hunt
A geometry scavenger hunt is a simple way to introduce students to shapes, lines, and angles in their surroundings.
Ask students to explore the classroom, school grounds, or a safe outdoor area and identify objects that represent different geometric concepts.
Materials: Paper, pencils, a recording sheet, and optional cameras or tablets.
Instructions:
- Create a list of geometric features students should find.
- Ask students to locate examples of circles, triangles, rectangles, cubes, and cylinders.
- Challenge them to identify parallel lines, perpendicular lines, and different types of angles.
- Have students sketch or photograph each object.
- Ask them to explain why each example matches the relevant geometric concept.
For example, students might identify a window as a rectangle, a wall clock as a circle, or the corner of a desk as a right angle.
Learning outcomes: Shape recognition, geometric vocabulary, observation, and classification.
For older students, extend the activity by asking them to estimate angles or calculate the perimeter of suitable objects.
2. Measure a Classroom Using Geometry
Classrooms provide an accessible environment for exploring length, perimeter, area, and scale.
Ask students to imagine that the school wants to install new flooring or rearrange the classroom furniture. Their task is to measure the room and prepare a simple plan.
Materials: Measuring tapes, rulers, graph paper, and calculators.
Instructions:
- Measure the classroom’s length and width.
- Calculate its perimeter using the formula (P = 2(l+w)).
- Calculate its floor area using (A = l \times w), assuming the room is rectangular.
- Draw a scaled floor plan showing desks, doors, windows, and other features.
- Compare different furniture arrangements and discuss how they affect available space.
Example:
Suppose a rectangular classroom is 8 meters long and 6 meters wide.
Perimeter:
[
P=2(8+6)=28\text{ m}
]
Area:
[
A=8\times6=48\text{ m}^2
]
Students can conclude that the room has a perimeter of 28 meters and a floor area of 48 square meters.
This activity helps learners understand the difference between measuring a boundary and measuring the surface inside it.
3. Explore Geometry in Architecture
Buildings offer many examples of geometric shapes, angles, symmetry, and structural design.
Show students photographs of houses, bridges, towers, religious buildings, museums, or other familiar structures. Alternatively, organize a supervised walk around the school to observe architectural features.
Ask students to identify triangles, rectangles, circles, arches, parallel lines, and symmetrical arrangements.
They can then investigate questions such as:
- Why might architects use triangular structures in some roofs and bridges?
- Where can we identify symmetry in a building?
- How do repeated shapes contribute to a building’s appearance?
- Which geometric shapes appear in windows, doors, and floor plans?
For a hands-on extension, challenge students to build a model structure using paper, drinking straws, craft sticks, or building blocks.
Ask each group to explain the geometric choices they made and test whether their structure remains stable.
Learning outcomes: Shape properties, symmetry, angles, spatial reasoning, and introductory engineering design.
4. Design a School Garden
A school garden project connects geometry with environmental education and practical planning.
Students can design a garden with rectangular planting beds, circular flower areas, triangular sections, or paths connecting different spaces.
Materials: Measuring tape, graph paper, pencils, and optional string or chalk.
Instructions:
- Choose a suitable garden area and establish its dimensions.
- Draw the garden on graph paper using an agreed scale.
- Divide the space into different geometric shapes.
- Calculate the area of each planting section.
- Determine the perimeter of each section when planning borders or fencing.
- Present the final design and explain how the available space is used.
Example:
A rectangular vegetable bed measures 4 meters by 2 meters.
[
A=4\times2=8\text{ m}^2
]
Its perimeter is:
[
P=2(4+2)=12\text{ m}
]
Students can determine that the bed covers 8 square meters and has a boundary measuring 12 meters.
For more advanced learners, introduce composite shapes, irregular garden layouts, or cost estimates for fencing and materials.
5. Investigate Angles in Sports
Sports provide meaningful examples of angles, distances, direction, and geometric relationships.
Students can examine basketball courts, soccer fields, tennis courts, running tracks, or playground markings. They can identify right angles, parallel lines, intersecting lines, and circles.
For example, a basketball player must consider direction and the angle of a shot. A soccer player must judge the position of teammates, opponents, and the goal.
Activity idea:
Ask students to draw a simple sports court and label its geometric features. They can measure or estimate selected angles, identify symmetrical sections, and compare the dimensions of different areas.
Older students can investigate how changing the angle or distance of a movement affects a mathematical model of the situation.
Keep the emphasis on understanding the geometry rather than assuming that every sporting outcome can be explained by one angle or measurement.
Learning outcomes: Angles, coordinates, symmetry, distance, and spatial relationships.
6. Create Symmetrical Art and Patterns
Geometry and art work naturally together because both involve shape, structure, repetition, and visual balance.
Students can explore symmetry through paper folding, geometric drawings, mosaics, fabric patterns, tile designs, or culturally significant decorative artwork.
Materials: Paper, rulers, pencils, colored pencils, and optional pattern blocks.
Instructions:
- Introduce line symmetry by showing an image that can be divided into matching halves.
- Ask students to fold paper and draw a shape along the fold.
- Have them open the paper and observe the symmetrical result.
- Challenge them to create a pattern using repeated shapes.
- Ask them to identify lines of symmetry, rotations, or translations in their designs.
Students can also examine tessellations, in which shapes cover a surface without gaps or overlaps.
Triangles, squares, and regular hexagons provide useful starting points for exploring how shapes fit together.
Learning outcomes: Symmetry, transformations, shape composition, pattern recognition, and creativity.
7. Calculate the Area of Everyday Objects
Many familiar objects can help students understand area, including books, notebooks, desks, tabletops, and rectangular floor tiles.
Instead of immediately introducing formulas, allow students to cover a surface with equal-sized squares or use grid paper to estimate how much space it occupies.
Once students understand the concept, introduce the area formula for rectangles.
Example:
A tabletop measures 120 centimeters in length and 60 centimeters in width.
[
A=120\times60=7{,}200\text{ cm}^2
]
The surface area is 7,200 square centimeters.
Ask students to estimate the answer before calculating it. This encourages them to think about whether their final result is reasonable.
For a more challenging task, students can calculate the areas of composite shapes by dividing them into smaller rectangles and triangles.
8. Build Three-Dimensional Shapes
Three-dimensional geometry becomes more meaningful when students can construct and handle physical models.
Use cardboard, paper nets, reusable building blocks, or craft materials to create cubes, cuboids, prisms, pyramids, and cylinders.
Ask students to identify each shape’s faces, edges, and vertices where applicable. They can also compare how different shapes are constructed and how they occupy space.
Activity idea:
Give students a collection of paper nets and ask them to predict which three-dimensional shape each net will form. They can then fold the nets to test their predictions.
After building the models, discuss practical examples such as:
- Cubes in some storage containers.
- Cuboids in boxes and books.
- Cylinders in cans and pipes.
- Spheres in balls and some decorative objects.
- Triangular prisms in certain roof structures.
Older students can calculate surface area and volume.
For example, a cuboid measuring 5 cm by 3 cm by 2 cm has a volume of:
[
V=5\times3\times2=30\text{ cm}^3
]
Explain that volume measures the space occupied by a three-dimensional object, while surface area measures the total area of its outside surfaces.
9. Measure Heights Using Shadows
Students can use shadows to investigate proportional relationships and similar triangles.
This activity works best outdoors on a sunny day, with suitable objects and a clear view of their shadows.
Materials: A measuring tape, a straight stick of known height, and a calculator.
Instructions:
- Measure the height of a vertical stick.
- Measure the length of its shadow.
- Measure the shadow of a taller object at approximately the same time.
- Compare the ratios of height to shadow length.
- Estimate the taller object’s height using a proportion.
Example:
A 1-meter stick casts a shadow that is 0.8 meters long. A nearby tree casts a shadow that is 4 meters long.
Assuming the ground is approximately level and both shadows are measured under the same sunlight conditions:
[
\frac{1}{0.8}=\frac{h}{4}
]
Therefore:
[
h=\frac{4\times1}{0.8}=5\text{ m}
]
The estimated tree height is 5 meters.
Explain that the estimate depends on the accuracy of the measurements and the assumption that the stick and tree form comparable triangles with their shadows.
Learning outcomes: Ratios, proportions, similar triangles, measurement, and estimation.
10. Explore Geometry Through Maps and Coordinates
Maps connect geometry with navigation, geography, and spatial thinking.
Students can use a printed map, a classroom grid, or a simple neighborhood diagram to explore position, distance, direction, and coordinates.
Instructions:
- Draw a grid and label its horizontal and vertical axes.
- Mark familiar locations, such as a classroom, library, playground, or school entrance.
- Assign coordinates to selected locations.
- Ask students to describe routes between points.
- Calculate distances on the grid and apply a scale to estimate real-world distances.
For example, if one grid unit represents 10 meters, a straight-line distance of 6 grid units represents 60 meters.
Older students can calculate distances between coordinate points or explore reflections, rotations, and translations on the coordinate plane.
This activity also encourages students to distinguish between straight-line distance and the longer route they might actually walk.
11. Investigate Circles Through Wheels and Everyday Objects
Circles are common in bicycles, clocks, plates, lids, wheels, and many mechanical designs.
Students can investigate the relationship between a circle’s radius, diameter, and circumference.
Materials: Circular objects, string, rulers, and calculators.
Instructions:
- Select several circular objects.
- Measure each object’s diameter.
- Use string to estimate its circumference.
- Divide the circumference by the diameter.
- Compare the results and discuss why the ratios are approximately equal.
The circumference of a circle is calculated using:
[
C=\pi d
]
where (C) is circumference, (d) is diameter, and (\pi) is approximately 3.14.
Example:
A circular lid has a diameter of 20 centimeters.
[
C\approx3.14\times20=62.8\text{ cm}
]
Its circumference is approximately 62.8 centimeters.
This investigation helps students see how a mathematical constant describes a relationship found in everyday objects.
12. Plan a Playground Using Geometry
Designing a playground is a collaborative project that combines geometric reasoning, measurement, creativity, and practical decision-making.
Students can create a scaled plan containing rectangular activity areas, circular play spaces, walking paths, and triangular or polygonal garden sections.
Project steps:
- Establish the total available area.
- Choose appropriate shapes for different playground zones.
- Draw a scaled layout on graph paper.
- Calculate the area and perimeter of each section.
- Check whether the design fits within the available space.
- Present the plan and justify the placement of each feature.
Students can compare alternative layouts and explain which design makes better use of space.
For older learners, introduce constraints such as a limited budget, required walking paths, or a minimum area for each activity zone.
Remind students that a mathematical model is only one part of real playground design. Actual construction also requires professional safety standards, accessibility planning, and appropriate supervision.
How Geometry Is Used in Everyday Life
Real-world examples help students understand why geometric concepts are useful beyond mathematics lessons.
| Real-world setting | Geometry concepts | Example task |
|---|---|---|
| Architecture | Angles, shapes, symmetry | Identify geometric features in a building |
| Gardening | Area, perimeter, scale | Calculate the space needed for planting beds |
| Construction | Length, angles, volume | Estimate materials for a simple project |
| Sports | Angles, distance, coordinates | Map a court and identify its geometric features |
| Art and design | Symmetry, transformations, tessellations | Create a repeating geometric pattern |
| Packaging | Surface area, volume | Compare the capacity of different boxes |
| Navigation | Coordinates, distance, direction | Plan and measure a route on a grid |
| Manufacturing | Circles, dimensions, geometric models | Measure circular parts and compare proportions |
These applications demonstrate that geometry supports many kinds of practical reasoning. It helps people describe spaces, compare designs, measure materials, and communicate spatial information accurately.
A Step-by-Step Method for Teaching Real-World Geometry
Successful geometry lessons require more than showing students objects that resemble familiar shapes. Teachers should guide learners from observation to mathematical explanation and application.
Step 1: Begin With a Familiar Object or Problem
Start with something students can see or use, such as a classroom desk, window, garden, or sports court.
Ask an open-ended question:
- What shapes can you identify?
- How could you measure this object?
- Which dimensions would you need to calculate its area?
- How might you represent this space on paper?
These questions encourage curiosity before students begin calculations.
Step 2: Introduce the Relevant Geometric Concept
Connect students’ observations to formal mathematical vocabulary.
For example, if students measure the boundary of a garden, introduce perimeter. If they investigate how much ground the garden covers, introduce area.
Explain the difference between related concepts and use diagrams or physical demonstrations where helpful.
Step 3: Let Students Measure or Construct
Provide opportunities for students to use rulers, measuring tapes, string, graph paper, blocks, or other appropriate materials.
Encourage them to record their measurements and identify any assumptions they make.
Hands-on work should be purposeful: students should know what they are investigating and what mathematical question they are trying to answer.
Step 4: Move From Concrete Examples to Mathematical Models
Once students have explored a real object, ask them to draw it, label its dimensions, and represent it using a diagram or formula.
For example, a garden can be represented as a rectangle. Students can then calculate its area using length multiplied by width.
This process helps learners connect the physical object with its mathematical representation.
Step 5: Ask Students to Explain Their Reasoning
Ask students to describe why they selected a particular formula or method.
Useful questions include:
- Why did you use area rather than perimeter?
- How can you check whether your answer is reasonable?
- What would change if one dimension doubled?
- Could you solve the problem another way?
Explanations reveal whether students understand the concept or are simply following a memorized procedure.
Step 6: Apply the Concept to a New Situation
Finish by asking students to solve a related problem in a different setting.
After calculating the area of a classroom floor, for example, students might calculate the area of a garden or estimate how many square tiles would cover a tabletop.
Applying a concept in a new context helps teachers assess whether students can transfer their understanding beyond the original activity.
Sample Lesson Plan: Geometry in Our School
This lesson plan is suitable for upper elementary or middle-school students and can be adapted for different grade levels.
Topic: Real-world geometry and measurement
Suggested duration: 45–60 minutes
Learning objectives: By the end of the lesson, students should be able to identify geometric features in their environment, measure selected objects, calculate appropriate dimensions, and explain how geometry applies to everyday situations.
Lesson structure
1. Introduction — 5–10 minutes
Show students photographs of buildings, windows, furniture, and playground equipment. Ask them to identify shapes, angles, and lines.
2. Exploration — 15 minutes
Organize students into small groups. Ask each group to find three to five suitable objects around the classroom or school and record their geometric features.
3. Measurement and calculation — 15–20 minutes
Have groups measure selected rectangular objects. They can calculate perimeter and area, label a sketch, and check their answers.
4. Presentation — 5–10 minutes
Ask each group to share one example and explain how they used geometry to analyze it.
5. Reflection — 5 minutes
Ask students to write one geometric concept they used, one challenge they encountered, and one additional place where they could apply the same concept.
Assessment questions
Teachers can use questions such as:
- What is the difference between area and perimeter?
- How did you decide which measurements to collect?
- Which geometric properties did you observe?
- How could you check the accuracy of your calculations?
- How might you use the same concept in another real-world situation?
The answers help teachers identify misconceptions and decide which concepts require additional practice.
Adapting Geometry Activities for Different Grade Levels
Students benefit most when activities match their current understanding and provide an appropriate level of challenge.
Early Elementary Students
Focus on identifying, sorting, and describing basic shapes.
Suitable activities include shape hunts, building with blocks, matching objects to shapes, and creating symmetrical pictures.
Use simple language and encourage students to explain what they notice about each object.
Upper Elementary Students
Introduce measurement, perimeter, area, angles, symmetry, and basic three-dimensional shapes.
Students can measure classroom objects, create garden plans, investigate patterns, and calculate the dimensions of simple designs.
Encourage them to use diagrams and explain the reasoning behind their calculations.
Middle-School Students
Extend activities to include scale drawings, composite shapes, volume, surface area, coordinate geometry, ratios, and similar triangles.
Students can estimate the heights of objects using shadows, compare architectural designs, or prepare scaled plans for a playground.
Require them to show calculations, justify assumptions, and check whether their results are realistic.
High-School Students
Use more complex applications involving trigonometry, coordinate geometry, transformations, optimization, and mathematical modeling.
Students might estimate inaccessible distances, analyze architectural structures, compare design constraints, or model a practical problem using geometric relationships.
Ask learners to evaluate the limitations of their models and explain how measurement error affects their conclusions.
Tips for Making Real-World Geometry Activities More Effective
Teachers can improve the quality of geometry lessons by focusing on understanding, accessibility, and meaningful mathematical discussion.
Use accessible materials. Rulers, paper, string, cardboard, blocks, and measuring tapes are often sufficient for practical geometry tasks.
Encourage estimation before calculation. Ask students to predict a measurement or answer before using a formula. This helps develop number sense and provides a useful check on their work.
Connect vocabulary to physical examples. Introduce mathematical terms when students can see or manipulate the concept being discussed.
Allow multiple approaches. Students may use diagrams, physical models, calculations, or verbal explanations to solve a problem. Comparing approaches encourages flexible thinking.
Discuss measurement accuracy. Real objects are not always perfect geometric shapes. Students should consider irregular edges, rounding, unit conversions, and the limitations of their measuring tools.
Include collaborative work. Assign roles such as measurer, recorder, calculator, and presenter so that each student has a meaningful contribution.
Make activities inclusive. Provide written instructions, visual examples, accessible tools, and alternative ways to participate. Outdoor activities can often be adapted to indoor spaces.
Prioritize mathematical understanding over decoration. A creative project is most effective when students must explain the geometric relationships, measurements, or calculations involved.
Common Challenges When Teaching Geometry Through Real-World Examples
Practical activities can be engaging, but students may still misunderstand important concepts. Teachers can address these challenges directly.
Confusing Area With Perimeter
Students sometimes use a perimeter formula when they need area, or vice versa.
Use a rectangle on graph paper to demonstrate the difference. Trace its boundary to represent perimeter, then shade the interior squares to represent area.
Ask students to state what the problem is measuring before choosing a formula.
Choosing the Wrong Formula
Students may memorize formulas without understanding when to use them.
Provide diagrams, real objects, and short problem scenarios. Ask learners to identify the required quantity and label the known dimensions before calculating.
Making Inaccurate Measurements
Measurements can be affected by tool placement, rounding, irregular surfaces, or incorrect units.
Demonstrate how to position a measuring tape and read a scale. Encourage students to repeat measurements when appropriate and record units alongside every value.
Struggling to Visualize Three-Dimensional Shapes
Some students find it difficult to connect a flat diagram with a three-dimensional object.
Use physical models, foldable nets, building blocks, and drawings from different viewpoints. Ask students to predict what a shape will look like before constructing it.
Focusing on the Activity Instead of the Mathematics
Students may enjoy building or drawing but overlook the mathematical objective.
Provide a clear question, require a measurement or calculation, and finish with a short explanation of what the activity demonstrates.
This ensures that hands-on learning supports conceptual understanding rather than becoming a disconnected craft exercise.
Frequently Asked Questions
1. What are real-world geometry activities for students?
Real-world geometry activities help students explore shapes, angles, measurements, spatial relationships, and geometric formulas through practical situations. Examples include measuring classroom objects, designing gardens, identifying shapes in buildings, constructing models, and using shadows to estimate heights.
2. Why is real-world geometry important for students?
Real-world geometry helps students connect mathematical ideas with everyday experiences. It encourages spatial reasoning, measurement accuracy, logical thinking, creativity, and practical problem-solving. It also helps learners understand when and why geometric concepts are useful.
3. What is the easiest geometry activity for beginners?
A geometry scavenger hunt is an accessible starting point. Students search their classroom or home for circles, triangles, rectangles, cubes, and other familiar shapes. Teachers can extend the activity by introducing angles, symmetry, and parallel or perpendicular lines.
4. How can teachers teach area and perimeter through real-life examples?
Teachers can ask students to measure a rectangular garden, desk, classroom, or tabletop. Perimeter describes the total distance around the boundary, while area describes the surface enclosed by that boundary. Students can calculate both quantities and explain how each would be used in a practical situation.
5. How can geometry activities support STEM learning?
Geometry activities can connect mathematics with science, technology, and engineering. Students may build structures, create scaled designs, analyze shadows, measure objects, or construct three-dimensional models. These tasks combine mathematical reasoning with observation, design, testing, and communication.
6. Can students learn geometry without expensive equipment?
Yes. Many effective activities require only everyday materials such as paper, pencils, rulers, string, cardboard, and building blocks. Students can explore shapes, symmetry, area, perimeter, angles, and three-dimensional models without specialized technology.
7. How can teachers assess students during practical geometry lessons?
Teachers can assess students by observing their measurement techniques, reviewing calculations and diagrams, asking questions, and evaluating explanations. Short reflection tasks can reveal whether students understand the concepts and can apply them to a new situation.
Conclusion
Teaching geometry through real-world examples helps students see mathematics as a practical way to understand and interact with their surroundings. Everyday objects, buildings, sports courts, gardens, maps, and patterns provide opportunities to explore shapes, angles, area, perimeter, volume, and spatial relationships.
By incorporating real world geometry activities for students into regular lessons, teachers can encourage learners to observe carefully, measure accurately, explain their reasoning, and apply mathematical ideas to meaningful problems.
The most effective approach combines hands-on exploration with clear mathematical instruction. Students should not only recognize geometric features but also understand the relationships behind them and learn how to use those relationships in unfamiliar situations.
Start with a simple classroom activity, ask students to investigate a genuine question, and gradually introduce more complex challenges. With consistent practice, geometry can become more understandable, engaging, and relevant to students’ everyday lives.
