
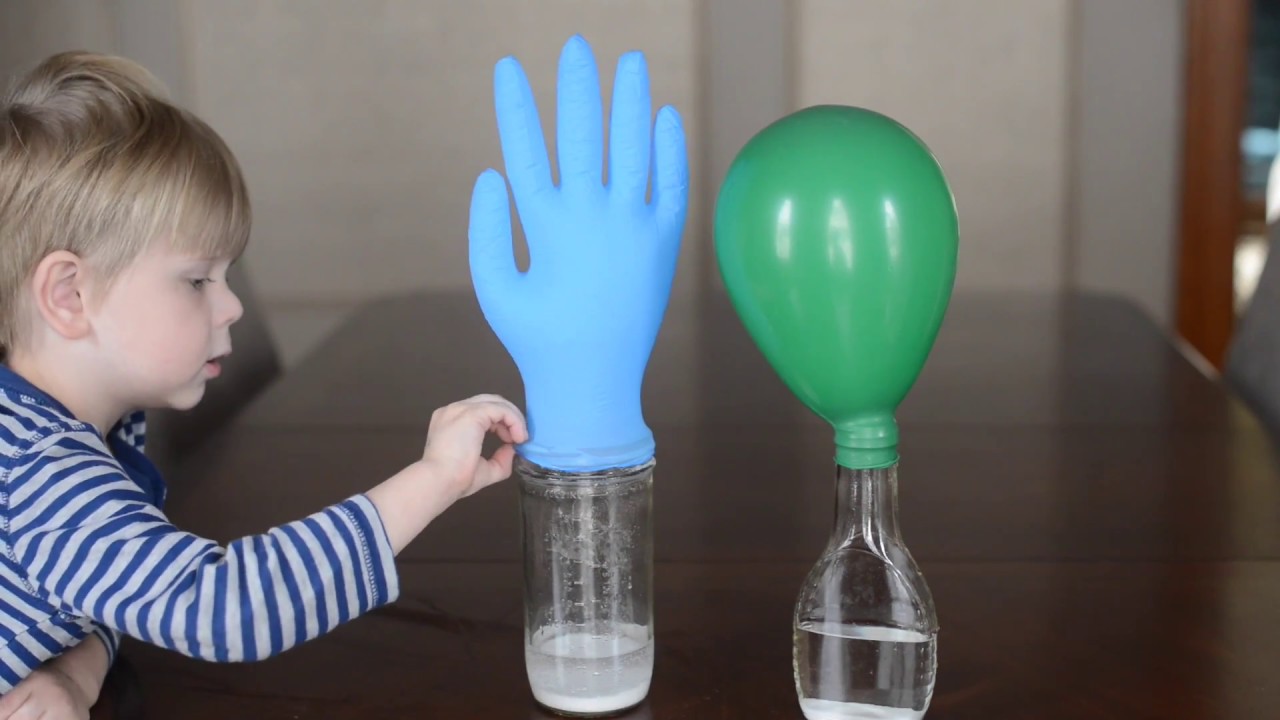
Science becomes more meaningful when students can observe it in action. A lesson about gravity, chemical reactions, electricity, or plant growth may seem abstract when presented only through textbooks. However, when students conduct a simple experiment and observe the results themselves, scientific concepts become easier to discuss, investigate, and remember.
Teachers do not always need expensive laboratory equipment to create effective science lessons. Many simple science experiments for classroom learning use everyday materials such as water, paper, magnets, balloons, seeds, and clear cups. These activities can introduce important scientific principles while helping students develop observation, measurement, critical thinking, and problem-solving skills.
The key is to move beyond simply demonstrating an interesting effect. Students should make predictions, observe what happens, record evidence, and explain their conclusions. This process helps them understand how scientific investigations work.
In this guide, you will discover 12 practical classroom experiments, the scientific concepts behind them, step-by-step instructions, and ways to adapt each activity for different age groups.
Why Are Simple Science Experiments Important for Classroom Learning?
Hands-on experiments give students opportunities to investigate questions rather than only memorize answers. They can compare results, identify patterns, test predictions, and discuss why an outcome occurred.
1. They Make Scientific Concepts Easier to Understand
Concepts such as density, capillary action, static electricity, and air pressure can be difficult to visualize. A carefully designed experiment makes these ideas observable.
For example, students can see colored water travel through a paper towel, watch a balloon attract small pieces of paper, or observe bubbles forming during a chemical reaction.
These demonstrations provide concrete examples that teachers can connect to scientific explanations.
2. They Encourage Curiosity and Critical Thinking
A good experiment begins with a question. Instead of immediately explaining why an object floats, a teacher might ask students to predict which objects will float and then test their predictions.
Students learn that scientific thinking involves gathering evidence, comparing possible explanations, and revising ideas when observations do not match expectations.
3. They Develop Observation and Measurement Skills
Science requires careful observation. Students can measure how far a balloon travels, record how many seeds germinate, compare the temperatures of insulated containers, or track how quickly water moves through a material.
These tasks introduce data collection and help learners distinguish between an observation and an assumption.
4. They Make Science More Accessible
Low-cost experiments allow teachers to demonstrate scientific concepts without depending on specialized equipment. Everyday materials can support meaningful investigations in classrooms with limited resources.
Teachers can also divide students into small groups, provide shared materials, and assign roles so that everyone participates.
5. They Connect Science With Everyday Life
Students encounter science when they cook, garden, play sports, observe the weather, or use electrical devices.
Experiments help them connect classroom concepts with these familiar experiences. For example, a seed-growing activity can introduce plant needs, while a paper bridge challenge can demonstrate how engineering design affects strength.
12 Simple Science Experiments for Classroom Learning
The following activities cover basic concepts in physics, chemistry, biology, Earth science, and engineering. Each experiment includes materials, instructions, the scientific explanation, and a question teachers can use to encourage further investigation.
1. Walking Water Experiment: Understanding Capillary Action
<text color=”secondary” size=”sm”>Subject: Biology and physical science | Suggested level: Elementary</text>
<AsyncImage query=”walking water science experiment clear plastic cups colored water paper towel bridges classroom science” aspectRatio=”16:9″ width=”100%” />
The walking water experiment shows how water can move through a porous material. It is a useful introduction to capillary action, water absorption, and the movement of liquids through narrow spaces.
Materials needed
- Three or more clear cups
- Water
- Food coloring
- Paper towels
- A flat tray to catch spills
Procedure
- Arrange the cups in a row.
- Fill the first and third cups with water, leaving the middle cup empty.
- Add different food colors to the cups containing water.
- Fold paper towels into narrow strips.
- Place one end of each strip in a filled cup and the other end in the empty cup.
- Observe the cups at regular intervals and record the movement of the colored water.
After some time, students should see water travel along the paper towels and begin collecting in the empty cup.
What scientific concept does it explain?
Paper towels contain tiny spaces between their fibers. Adhesion between water and the fibers, together with cohesion between water molecules, helps water move through these spaces. This process is associated with capillary action.
Classroom extension
Ask students to compare different materials, such as paper towels, tissue paper, and cotton fabric. Which material moves water most effectively under the same conditions?
Students can record the distance traveled or the amount of water collected after a fixed period.
2. Balloon Static Electricity Experiment
<text color=”secondary” size=”sm”>Subject: Physics | Suggested level: Elementary to middle school</text>
<AsyncImage query=”static electricity balloon attracting small paper pieces science classroom experiment close up” aspectRatio=”16:9″ width=”100%” />
Static electricity helps explain how objects can attract one another without direct contact.
Materials needed
- One inflated balloon
- Small pieces of lightweight paper
- A dry cloth or wool fabric
Procedure
- Cut paper into small pieces and spread them across a clean table.
- Rub the balloon against dry wool or another suitable fabric for several seconds.
- Slowly bring the balloon close to the paper pieces without touching them.
- Observe whether the pieces move toward the balloon.
- Repeat the experiment with a balloon that has not been rubbed.
What scientific concept does it explain?
Rubbing the balloon can transfer electric charge between materials. The charged balloon can attract nearby neutral paper pieces by causing their charges to redistribute slightly, a process called polarization.
The attraction may be weaker in humid conditions because moisture can help charge dissipate.
Classroom extension
Ask students to compare the effects of different fabrics or different rubbing times. They should change one factor at a time and keep the paper pieces and distance as consistent as possible.
This experiment introduces electric charge, attraction, and the importance of controlled testing.
3. Baking Soda and Vinegar Reaction
<text color=”secondary” size=”sm”>Subject: Chemistry | Suggested level: Elementary to middle school</text>
<AsyncImage query=”baking soda vinegar chemical reaction foaming in open clear cup on tray classroom science experiment” aspectRatio=”16:9″ width=”100%” />
This familiar experiment demonstrates how mixing two substances can produce a chemical reaction and release a gas.
Materials needed
- Baking soda
- Vinegar
- A small open cup
- A tray
- A measuring spoon
Procedure
- Place the cup on the tray.
- Add one small spoonful of baking soda.
- Slowly pour a small amount of vinegar into the cup.
- Observe the bubbles and foam.
- Record what changes when the substances are combined.
What scientific concept does it explain?
Baking soda, also known as sodium bicarbonate, reacts with the acetic acid in vinegar. The reaction produces carbon dioxide gas, water, and dissolved substances.
The carbon dioxide forms bubbles that rise through the liquid. This provides visible evidence that a chemical reaction is taking place.
Classroom extension
Students can compare two trials using different measured amounts of vinegar while keeping the amount of baking soda constant.
Ask them to observe the bubbling and discuss why changing one ingredient may affect the reaction.
Safety note: Conduct the experiment in an open container on a tray. Never seal the reaction in a bottle or other closed container because gas pressure can build up. Do not allow students to taste the materials.
4. Floating and Sinking: Exploring Density and Buoyancy
<text color=”secondary” size=”sm”>Subject: Physics | Suggested level: Elementary</text>
<AsyncImage query=”classroom science experiment floating sinking objects in transparent water container coins leaves plastic items” aspectRatio=”16:9″ width=”100%” />
Floating and sinking experiments help students investigate why different objects behave differently in water.
Materials needed
- A clear container filled with water
- A leaf
- A small plastic object
- A coin
- A wooden block
- Several other clean, safe objects
Procedure
- Show students the objects before placing them in water.
- Ask them to predict whether each object will float or sink.
- Record the predictions in a table.
- Place each object in the water one at a time.
- Record the actual result and compare it with the prediction.
| Object | Prediction | Observation |
|---|---|---|
| Leaf | Float or sink? | Record the result |
| Coin | Float or sink? | Record the result |
| Wooden block | Float or sink? | Record the result |
| Plastic object | Float or sink? | Record the result |
What scientific concept does it explain?
An object’s floating behavior depends on its average density, its shape, and the buoyant force exerted by the surrounding water.
An object generally floats when it can displace enough water for the buoyant force to balance its weight before it becomes completely submerged.
Students may be surprised that a large, hollow object can float while a much smaller solid object sinks.
Classroom extension
Give students a small piece of aluminum foil and ask them to shape it into a compact ball and then a boat. Compare the results. The boat shape can displace more water before becoming submerged, allowing it to support more weight.
5. Paper Bridge Challenge: Learning About Engineering and Forces
<text color=”secondary” size=”sm”>Subject: Physics and engineering | Suggested level: Elementary to middle school</text>
<AsyncImage query=”students classroom STEM paper bridge challenge folded paper bridge spanning two books with coins as weights” aspectRatio=”16:9″ width=”100%” />
A paper bridge challenge introduces structural design and shows how changing the shape of a material can affect its strength.
Materials needed
- Sheets of paper
- Two identical books or blocks
- Coins or other small standardized weights
- A ruler
Procedure
- Place two books a short distance apart.
- Lay a flat sheet of paper across the gap to create a simple bridge.
- Add coins one at a time near the center until the bridge bends significantly.
- Record the number of coins supported.
- Repeat using a new sheet folded into an accordion or a simple beam shape.
- Compare the results.
Keep the gap, paper size, and loading method as consistent as possible.
What scientific concept does it explain?
The shape of a structure affects how forces are distributed through it. Folding paper can increase its resistance to bending by changing its geometry and stiffness.
This illustrates an important engineering principle: a material’s performance depends not only on what it is made from but also on how it is designed and used.
Classroom extension
Ask students to design a bridge that supports the greatest number of coins while using only one sheet of paper.
Groups should draw their designs, explain their reasoning, test their structures, and discuss what they would change in a second attempt.
6. Grow Seeds to Investigate Plant Germination
<text color=”secondary” size=”sm”>Subject: Biology | Suggested level: Elementary</text>
<AsyncImage query=”bean seeds germinating on damp paper towel inside transparent classroom observation container roots shoots” aspectRatio=”16:9″ width=”100%” />
Growing seeds gives students an opportunity to observe a biological process over several days rather than in a single lesson.
Materials needed
- Bean or other suitable seeds
- Paper towels
- Clear containers
- Water
- Labels and an observation sheet
Procedure
- Place a damp paper towel inside each clear container.
- Position a few seeds where students can observe them.
- Keep the paper towel moist without flooding the seeds.
- Place the containers in an appropriate location.
- Observe the seeds daily and record visible changes.
- Draw or photograph the developing roots and shoots.
What scientific concept does it explain?
Germination is the process by which a seed begins to grow into a new plant. Seeds need suitable conditions, commonly including water, oxygen, and an appropriate temperature. Light requirements vary by species and growth stage.
Water activates processes inside the seed that allow the embryo to resume growth.
Classroom extension
Students can compare seeds kept under different conditions, such as moist and dry paper towels. To make a fair comparison, keep other conditions as similar as possible.
Ask students to record how many seeds germinate and how long visible changes take.
This activity introduces life cycles, plant development, observation over time, and the importance of controlled variables.
7. Investigate Magnetism With Everyday Materials
<text color=”secondary” size=”sm”>Subject: Physics | Suggested level: Elementary</text>
<AsyncImage query=”bar magnet attracting iron paper clips and testing everyday objects on classroom table science activity” aspectRatio=”16:9″ width=”100%” />
Magnets help students investigate forces that can act without direct contact.
Materials needed
- A bar magnet
- Paper clips
- A wooden pencil
- A plastic ruler
- Aluminum foil
- Other clean classroom objects
Procedure
- Place the objects on a table.
- Ask students to predict which objects will be attracted to the magnet.
- Move the magnet near each object without touching it.
- Record which objects respond.
- Compare predictions with observations.
What scientific concept does it explain?
Magnets produce magnetic fields. Materials containing suitable forms of iron, nickel, cobalt, or certain alloys can be strongly attracted to magnets.
Not all metals are magnetic. For example, ordinary aluminum foil and copper are not attracted to a typical classroom bar magnet in the same way as an iron paper clip.
Classroom extension
Ask students to investigate whether a magnet can attract a paper clip through a sheet of paper or thin cardboard.
They can also compare different distances to explore how the observed attraction changes as the magnet moves farther away.
Keep magnets away from students who may swallow small magnetic objects, and follow the school’s guidance around electronic or medical devices.
8. Shadow Experiment: Understanding Light and Position
<text color=”secondary” size=”sm”>Subject: Physics and Earth science | Suggested level: Elementary</text>
<AsyncImage query=”classroom light source pencil and object casting shadow on white paper science experiment” aspectRatio=”16:9″ width=”100%” />
Shadows provide an accessible way to investigate how light travels and how an object’s position affects the shape and size of a shadow.
Materials needed
- A flashlight
- A pencil or small solid object
- White paper or a light-colored surface
- A ruler
Procedure
- Place the object on the paper.
- Shine the flashlight toward it from one direction.
- Trace or measure the shadow.
- Move the flashlight closer to the object and repeat.
- Move the flashlight to a different angle.
- Compare the shadow size, position, and shape.
What scientific concept does it explain?
A shadow forms when an object blocks light traveling toward a surface. The size and position of the shadow depend on the relative positions of the light source, object, and receiving surface.
When the light source moves closer, the shadow may become larger because the light rays spread out from the source.
Classroom extension
Ask students to design a simple experiment that tests how changing the flashlight’s distance affects shadow length.
For a longer investigation, students can record the shadows of an outdoor object at different times of day, taking care to keep the object’s position fixed.
9. Paper Chromatography: Separating Colors
<text color=”secondary” size=”sm”>Subject: Chemistry | Suggested level: Upper elementary to middle school</text>
<AsyncImage query=”paper chromatography experiment marker ink separating colors on coffee filter paper strip in clear cup water science classroom” aspectRatio=”16:9″ width=”100%” />
Paper chromatography shows how a mixture of substances can separate as a liquid travels through paper.
Materials needed
- Water-soluble felt-tip markers
- Coffee filter paper or suitable chromatography paper
- Water
- A clear cup
- A pencil and tape
Procedure
- Cut a strip of paper.
- Draw a small dot using a water-soluble marker near the bottom of the strip.
- Add a shallow amount of water to the cup.
- Position the strip so its bottom edge touches the water while the ink dot remains above the waterline.
- Secure the strip and allow the water to travel upward.
- Observe the color patterns that develop.
What scientific concept does it explain?
As water moves through the paper, it carries some of the ink’s dissolved components with it. Different pigments can move at different rates because they interact differently with the solvent and the paper.
A single marker color may separate into several visible colors, showing that it contains a mixture of pigments.
Classroom extension
Students can compare several water-soluble markers using the same paper type and similar conditions. Ask them to identify which inks separate into multiple colors and how their patterns differ.
Teachers can connect this activity to the ways scientists separate and analyze mixtures.
10. Test Materials to Discover Thermal Insulation
<text color=”secondary” size=”sm”>Subject: Physics | Suggested level: Upper elementary to middle school</text>
<AsyncImage query=”classroom science experiment insulated cups wrapped in fabric foil and paper for temperature comparison” aspectRatio=”16:9″ width=”100%” />
Thermal insulation helps students understand how materials affect the transfer of heat.
Materials needed
- Three identical cups
- Warm water at a teacher-controlled safe temperature
- Paper, cloth, and another suitable insulating material
- Thermometers
- A timer
Procedure
- Prepare three identical cups and wrap each with a different material, leaving one as a control if appropriate.
- Add equal amounts of warm water at the same starting temperature.
- Measure and record the initial temperature in each cup.
- Record the temperatures again at fixed intervals.
- Compare how much the temperature changes over the same period.
What scientific concept does it explain?
Heat moves from warmer areas toward cooler surroundings through processes that include conduction, convection, and radiation. Insulating materials slow certain forms of heat transfer.
The effectiveness of a material depends on factors such as its structure, thickness, moisture, and how well it covers the cup.
Classroom extension
Ask students to predict which material will keep the water warmest. Have them create a line graph showing temperature over time.
For a fair test, use identical cups, equal water volumes, similar starting temperatures, and the same measurement intervals.
Safety note: Use comfortably warm, not boiling, water. Younger students should not handle hot liquids without close adult supervision.
11. Air Pressure Experiment With an Inverted Cup
<text color=”secondary” size=”sm”>Subject: Physics | Suggested level: Upper elementary to middle school</text>
<AsyncImage query=”science classroom demonstration transparent cup filled with water covered by stiff card and carefully inverted over tray” aspectRatio=”16:9″ width=”100%” />
This demonstration can help students investigate pressure and the forces acting on liquids and objects.
Materials needed
- A sturdy transparent cup
- Water
- A stiff, smooth card larger than the cup opening
- A tray or sink
Procedure
- Place the cup on the tray and fill it with water.
- Put the card flat over the opening, ensuring the rim is covered.
- With a hand firmly supporting the card, carefully invert the cup over the tray.
- Once the card is held securely against the opening, slowly remove the supporting hand.
- Observe whether the card remains in place and the water stays inside.
- Return the cup to its upright position carefully.
Perform this only as a teacher-led demonstration, preferably over a sink or deep tray.
What scientific concept does it explain?
Air pressure acts on surfaces in all directions. Under suitable conditions, the pressure difference across the card, together with the water’s pressure and the seal at the rim, can keep the card in place.
The result depends on factors such as the fit of the card, the amount of water, and whether air enters the cup.
Classroom extension
Ask students to predict what might happen if air enters the cup around the edge of the card. Discuss how pressure differences influence the result rather than suggesting that air pressure alone explains every part of the demonstration.
12. Build a Simple Water Filter Model
<text color=”secondary” size=”sm”>Subject: Environmental science | Suggested level: Upper elementary to middle school</text>
<AsyncImage query=”classroom environmental science demonstration homemade water filter clear bottle gravel sand cloth layers filtering muddy water into transparent cup” aspectRatio=”16:9″ width=”100%” />
A simple filter model helps students investigate how physical materials can remove some visible particles from water.
Materials needed
- A clean plastic bottle prepared by the teacher
- Clean gravel
- Clean sand
- Filter paper or clean cloth
- A collection container
- Water mixed with a small amount of soil
Procedure
- Prepare a safe demonstration filter using a bottle or funnel.
- Place the filter material in the apparatus, using cloth or filter paper to support the sand and gravel.
- Position a collection container underneath.
- Slowly pour the soil-water mixture through the filter.
- Observe the appearance of the water before and after filtering.
- Record which visible particles were removed and whether the water became clearer.
What scientific concept does it explain?
Filtration separates some suspended particles from a liquid by allowing the liquid to pass through a porous material while larger particles are retained.
Different filter materials capture particles of different sizes, and the result depends on how the filter is assembled and used.
Classroom extension
Students can compare different filter arrangements and record which produces the clearest-looking result. They should change one feature at a time when comparing designs.
Important safety note: This is a demonstration of physical filtration, not a method for making drinking water safe. Filtered water may still contain harmful microorganisms or dissolved contaminants. Do not drink it.
How to Turn a Simple Demonstration Into a Scientific Investigation
An exciting result can capture students’ attention, but the learning becomes more valuable when they investigate why it happened.
Teachers can use the following sequence to structure almost any classroom experiment.
Step 1: Ask a Testable Question
Begin with a question that students can investigate through observation or measurement.
Examples include:
- Which paper material absorbs the most water?
- Does changing a flashlight’s distance affect shadow size?
- Which paper bridge design supports the greatest weight?
- How does the amount of salt affect the floating behavior of an egg?
A focused question gives the experiment a clear purpose.
Step 2: Ask Students to Make a Prediction
Invite students to predict what will happen and explain why.
Predictions do not need to be correct. Their purpose is to make students’ existing ideas visible so they can compare them with the evidence.
Step 3: Identify the Variables
Explain which factor will change, which outcome will be measured, and which conditions should remain the same.
For a paper bridge experiment:
- Changed variable: The shape of the paper.
- Measured outcome: The number of identical coins supported before the bridge fails or bends beyond the agreed limit.
- Controlled conditions: Paper size, gap between supports, coin type, and loading method.
This helps students understand what makes a comparison fair.
Step 4: Follow the Procedure Carefully
Give students clear instructions and demonstrate any unfamiliar steps.
Prepare materials in advance, assign group roles, and explain safety rules before beginning. Younger learners may need picture-based instructions or direct teacher guidance.
Step 5: Record Observations and Measurements
Encourage students to use a notebook, table, drawing, or graph to record results.
Distinguish between observations and explanations. For example, “The balloon attracted four pieces of paper” is an observation, while “The balloon attracted them because it was electrically charged” is an explanation.
Step 6: Explain the Scientific Principle
After the experiment, connect the observed result with the relevant concept.
Use accurate scientific vocabulary, diagrams, and follow-up questions. If a result is unexpected, review the procedure and possible sources of error rather than assuming the experiment has failed.
Step 7: Repeat or Extend the Investigation
Ask students what they would change in a second trial or what new question they could investigate.
Repeating measurements can help identify whether a result is consistent. Changing one variable at a time helps students understand cause-and-effect relationships more clearly.
Sample Classroom Science Lesson Plan
This sample lesson uses the walking water experiment to teach capillary action, observation, and evidence-based explanations.
Topic: Water movement through paper
Suggested duration: 40–50 minutes, with additional observation time afterward
Learning objectives:
By the end of the lesson, students should be able to:
- Describe what happens when paper towels connect cups of water.
- Record observations at more than one time point.
- Explain how water can move through a porous material.
- Identify one variable that could be investigated in a follow-up experiment.
Lesson sequence
1. Introduction — 5 minutes
Show students the materials and ask: “Can water move from one cup to another without anyone pouring it directly?”
Ask students to write a prediction and give a reason.
2. Experiment setup — 10 minutes
Students arrange the cups, add colored water, and place the paper towel strips. The teacher checks that the setup is stable and that spills can be contained.
3. Observation — 10 minutes
Students observe the setup and record the initial appearance. They can continue monitoring it during later lessons or at designated intervals.
4. Scientific explanation — 10 minutes
Discuss water absorption, cohesion, adhesion, and capillary action at an age-appropriate level. Invite students to connect the explanation with their observations.
5. Reflection and assessment — 5–10 minutes
Ask students to answer:
- What did you observe?
- How did your results compare with your prediction?
- What scientific concept helps explain the result?
- What would you change if you repeated the investigation?
Assessment method
Evaluate students on their predictions, observations, participation, use of scientific vocabulary, and ability to connect evidence with an explanation.
The objective is not simply to obtain a particular result. Students should demonstrate that they understand the question being investigated and can explain what their evidence suggests.
How to Adapt Science Experiments for Different Grade Levels
Not every experiment is suitable for every age group in the same form. Teachers should adjust the complexity, supervision, and expected explanations to students’ developmental levels.
Early Elementary Students
Focus on simple observations, predictions, and descriptions.
Suitable activities include floating and sinking, color movement, shadows, magnets, and seed germination.
Ask questions such as “What do you notice?” and “What changed?” Encourage students to draw their observations and describe them in their own words.
Upper Elementary Students
Introduce measurement, tables, controlled variables, and basic scientific explanations.
Students can compare the strength of paper bridges, test static electricity, or investigate how materials affect heat loss.
Encourage them to explain their predictions and use evidence to support their conclusions.
Middle-School Students
Emphasize fair tests, repeated trials, data analysis, graphs, and more detailed explanations.
Students can compare chromatography patterns, investigate insulation, or design experiments that test one factor at a time.
Ask them to identify possible measurement errors and discuss whether the evidence supports their original prediction.
High-School Students
Extend activities into more formal investigations using quantitative measurements, mathematical models, and deeper scientific theory.
Students can analyze reaction variables, study heat transfer, compare filtration methods, or investigate motion and forces using repeated measurements.
Require students to explain limitations, evaluate evidence, and distinguish between a result that supports a hypothesis and one that proves a claim conclusively.
Essential Safety Guidelines for Classroom Experiments
Safety should be part of every science lesson, even when the materials appear ordinary.
Before starting an experiment, teachers should:
- Review the procedure and check the suitability of all materials for the students’ ages.
- Explain the activity and demonstrate any potentially messy or unfamiliar steps.
- Use eye protection when splashes or other hazards are reasonably possible.
- Keep food and drinks away from experiment materials.
- Never allow students to taste substances used in experiments.
- Avoid mixing cleaning products or unidentified chemicals.
- Keep reactions that produce gas in open containers; never seal them in rigid containers.
- Use only low-risk, teacher-approved electrical demonstrations, and never use household mains electricity.
- Supervise the handling of scissors, magnets, small objects, and warm liquids as appropriate.
- Clean spills promptly and wash hands after the activity.
- Dispose of materials according to school procedures and the nature of the experiment.
Teachers should also check for allergies, accessibility needs, and any school-specific laboratory rules. If an experiment requires equipment or materials beyond the teacher’s training, choose a safer alternative.
A simple experiment is most useful when students can focus on the scientific question without unnecessary risks.
Common Mistakes to Avoid When Teaching Science Experiments
Giving the Explanation Before Students Investigate
If students hear the complete explanation before observing the experiment, they may focus on repeating the teacher’s words rather than developing their own questions.
Whenever appropriate, begin with a prediction and allow students to observe the result before introducing the formal explanation.
Changing Too Many Variables at Once
If several conditions change between trials, students may not know which factor caused the difference.
Help them identify one main variable to change while keeping other relevant conditions as consistent as possible.
Ignoring Unexpected Results
An experiment may produce a different result because of measurement error, environmental conditions, or a misunderstanding of the procedure.
Encourage students to investigate these possibilities. Unexpected results can lead to valuable questions and better experimental design.
Focusing Only on the Visual Effect
A dramatic reaction or colorful demonstration can be memorable, but it does not automatically lead to scientific understanding.
Always include a question, observations, an explanation, and an opportunity for students to connect the result to a scientific concept.
Treating a Model as a Complete Representation of Reality
Classroom demonstrations simplify complex processes. For example, a homemade water filter cannot represent every stage of a professional water-treatment system.
Explain what the model demonstrates and what it does not show. This helps students develop a more accurate understanding of science.
Frequently Asked Questions
1. What are simple science experiments for classroom learning?
Simple science experiments for classroom learning are practical activities that help students investigate scientific concepts using accessible materials. Examples include walking water, static electricity with a balloon, floating and sinking objects, seed germination, paper bridge challenges, and shadow investigations.
2. Which science experiments are easiest for beginners?
Walking water, floating and sinking, magnetism, and shadow experiments are useful starting points because they involve straightforward setups and visible outcomes. Teachers should still supervise students and select materials appropriate for their age.
3. How do classroom experiments improve science learning?
Experiments give students opportunities to make predictions, observe changes, collect evidence, and explain results. They can help learners connect scientific theories with observable events while developing critical thinking and problem-solving skills.
4. Can teachers conduct science experiments without a laboratory?
Yes. Many introductory investigations can be conducted in an ordinary classroom using materials such as paper, water, cups, magnets, seeds, and rulers. Teachers should assess risks, prepare the workspace, and follow appropriate school safety procedures.
5. How long should a classroom science experiment take?
Many introductory demonstrations can be completed in 10–20 minutes, although discussion and assessment may require a full lesson. Activities such as seed germination or walking water need additional time for students to observe changes over several hours or days.
6. How can teachers make experiments suitable for different ages?
Younger students can focus on observation, predictions, and simple descriptions. Older students can measure outcomes, control variables, repeat trials, create graphs, and evaluate the reliability of their conclusions.
7. What should students write in a science experiment report?
A basic report can include the question, prediction, materials, procedure, observations, results, scientific explanation, and conclusion. Older students can also include variables, repeated trials, sources of error, and suggestions for improving the investigation.
8. How can teachers assess learning after an experiment?
Teachers can review students’ observation sheets, ask follow-up questions, assess diagrams or graphs, and have learners explain the scientific concept in their own words. A short reflection can show whether students understand the evidence rather than simply remembering the procedure.
Conclusion
Simple classroom experiments provide an effective way to help students explore the principles behind everyday scientific events. From watching water move through paper to investigating static electricity, magnetic attraction, plant germination, and heat transfer, each activity can turn an abstract concept into a practical learning experience.
The most effective simple science experiments for classroom learning combine accessible materials with a clear question, careful observations, accurate explanations, and appropriate safety measures.
Teachers can strengthen these lessons by encouraging students to make predictions, record evidence, compare results, and explain what they have learned. They should also help students understand that an unexpected result is an opportunity to investigate further rather than a reason to stop.
By making experimentation a regular part of science education, teachers can encourage curiosity, develop scientific reasoning, and help students build a stronger understanding of the world around them.
